
No Power In HP LCD Monitor Repaired

This HP LCD Monitor came in for repair with the complaint of no power. As usual, in order to check on the circuit boards inside, one must remove the cover. Make sure that you remove the cover gently and do not use a test pen to peel out otherwise you will leave a marking and your customer may not happy with it. You have to use a very thin and strong metal to peel out the cover start from the below of the cover. Once the bottom cover is opened, you can start to peel out the side cover and finally be able to remove the whole cover.
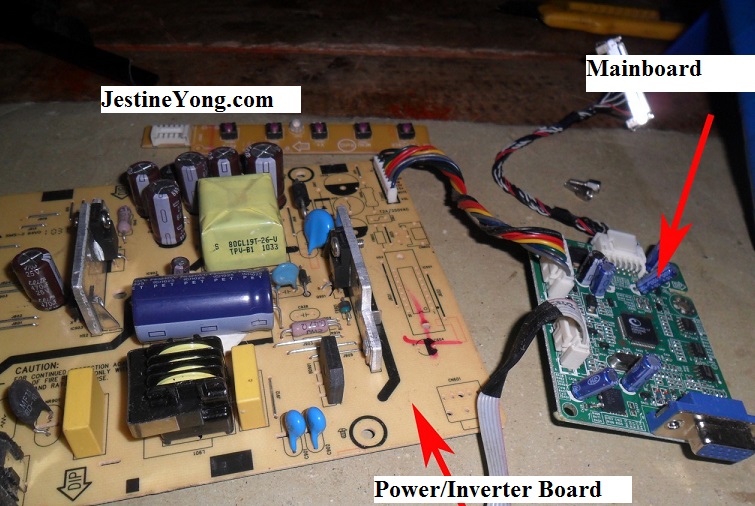
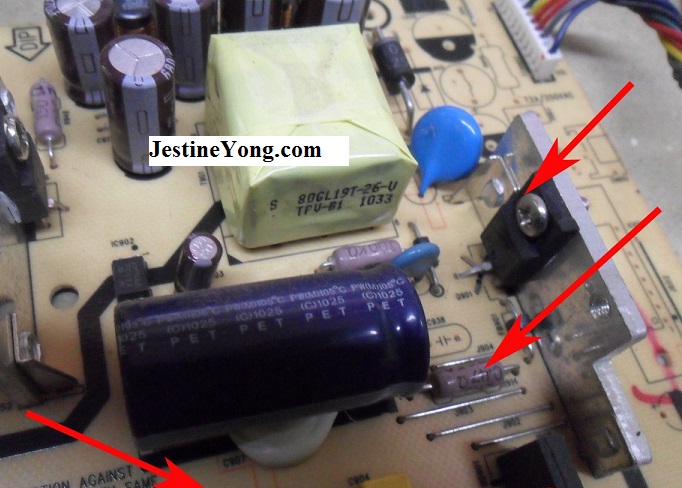
There are three circuit boards in most of the LCD monitor. It consist of the mainboard, front panel control board and the power/inverter board or I/P board-see the photo below:
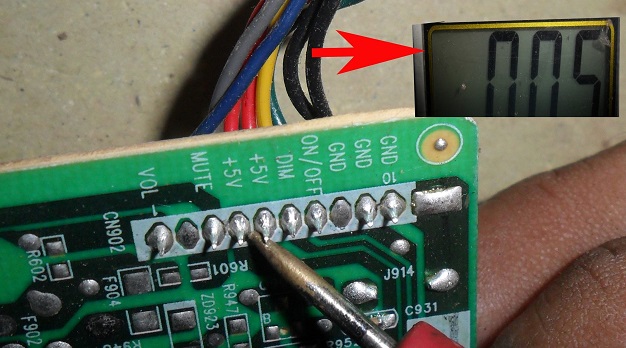
The main fuse checked to be good and when I powered it up and checked on the 5 volt output voltage there was no voltage. 0.05 volt was considered too small and negligible. This means the power supply board have problem.
So now I have to start troubleshooting starting from the beginning which is at the AC input area. Since fuse was tested good chances for bridge rectifier to go short circuit will be very rare. When I measured the big fat filter capacitor I noticed voltage was still present in the cap. I discharged the cap so that I can check on the board freely without have to worry about being discharged by the cap. It will give you a nasty shock if you accidentally touched on the capacitor pins/legs.
I just checked on some of the major components in the power primary circuit and all seems to be working fine.
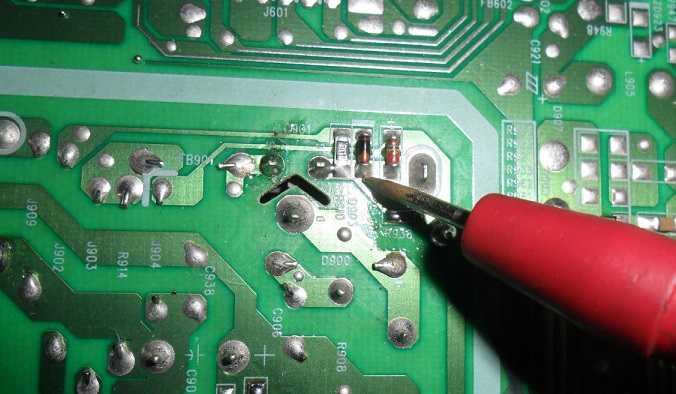
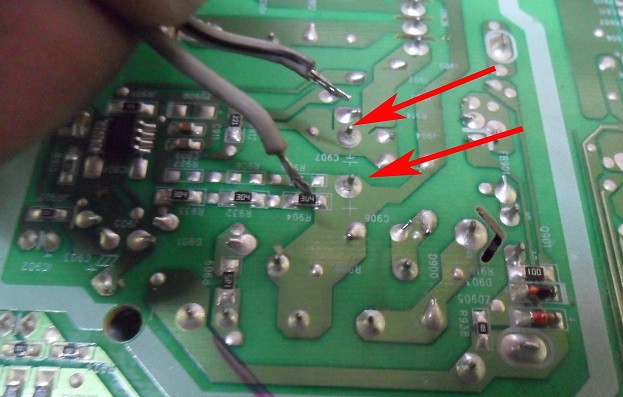
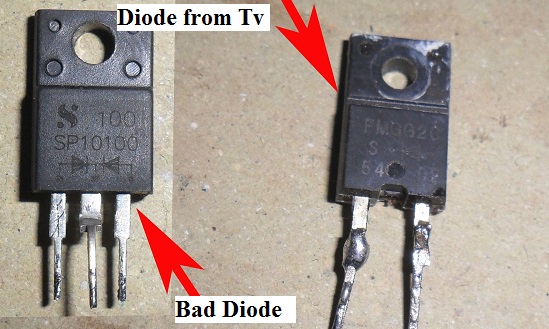
So my next test was the secondary output schottky diodes. There were two schottky diodes and one of them was shorted when I tested it on board.
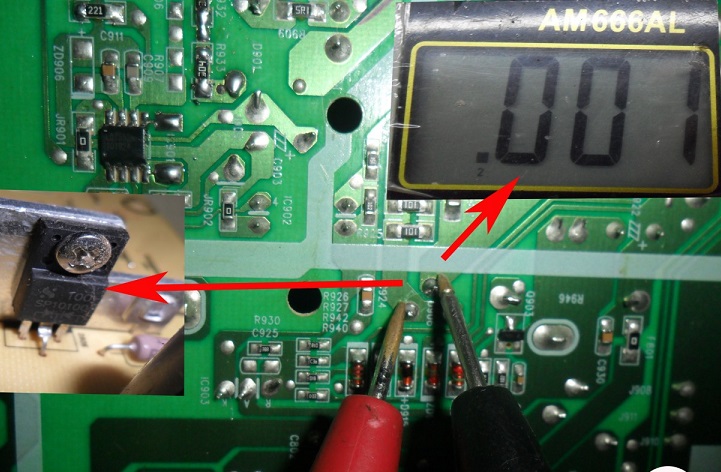
So I took the suspected diode out and recheck it again and the result was the same. This means one of the diodes in the schottky diode package was shorted and need replacement.
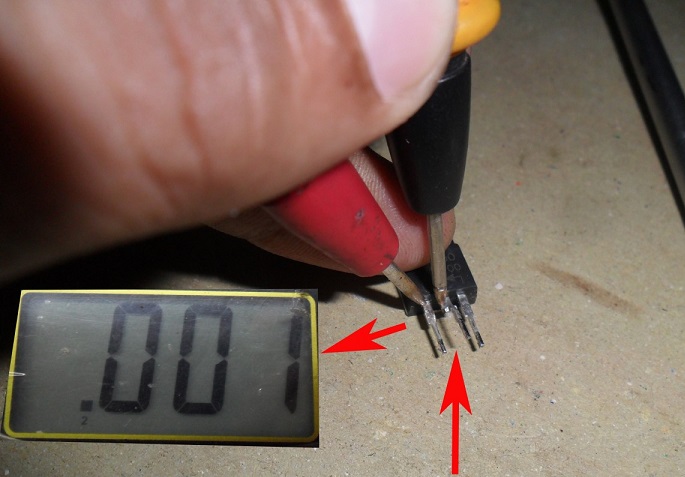
Since I could not find the actual part for replacement, I used another diode from a TV junk board to replace it.
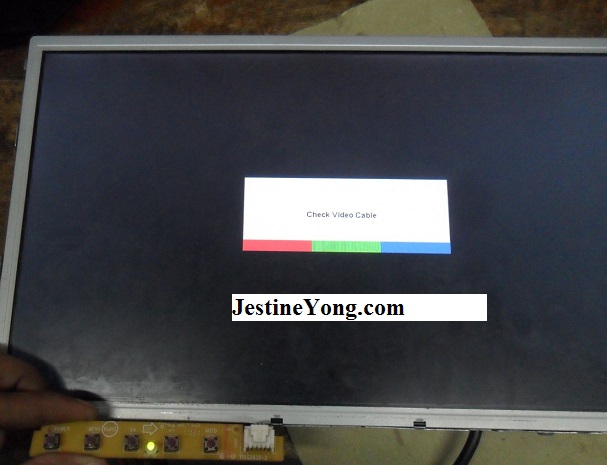
Guess what? The LCD Monitor came to life again and I had tested this LCD Monitor for many hours burn in test and the power remains good-see the photos below:

If you want to be an expert in LCD Monitor repair you can check out Jestine’ Yong LCD Monitor repair ebook HERE and the LCD Monitor true case histories VOLUME 1, 2 and 3 HERE.

This article was prepared for you by Suranga Bandara who owns an Electronics shop in Anuradapura, Sri Lanka.
Please give a support by clicking on the social buttons below. Your feedback on the post is welcome. Please leave it in the comments.
P.S- If you enjoyed reading this, click here to subscribe to my blog (free subscription). That way, you’ll never miss a post. You can also forward this website link to your friends and colleagues-thanks!
Note: You may check out his previous repair article in the below link:
https://www.jestineyong.com/suoer-dvd-player-no-power-repaired/
 (161)Dislikes
 (0)
(0)
14 Comments
Leave a Reply


Merlin Marquardt
November 30, 2015 at 12:00 pm
Good repair.
Emmanuel
November 30, 2015 at 2:07 pm
thanks a lot, I always enjoy ur post its really helping me.
Yogesh Panchal
November 30, 2015 at 2:37 pm
suranga,
Good fix Congratulations!.
Albert van Bemmelen
November 30, 2015 at 4:10 pm
Nice repair! Thanks.
joop
November 30, 2015 at 6:38 pm
Good work and thanks for publishing
Parasuraman S
November 30, 2015 at 8:57 pm
Good Job! Luckily it was solved with shorted diodes! Thanks for sharing!
Andre Gopee
December 1, 2015 at 2:18 am
God repair job. But you did not show how you connected the new diode in circuit. Can you share?
Humphrey Mambwe
December 1, 2015 at 2:20 am
thanks for sharing it was great adventure for me
Albert Ng
December 2, 2015 at 12:02 pm
thanks a lot,may i know the negetive black prob put in "GND"point , and red prob put in "+5V",
it is ok?
Suranga Electronics
December 2, 2015 at 5:43 pm
no no not 5v+, that is 0.005v, Not Come Any Supply.
Paris Azis
December 4, 2015 at 3:16 am
Hi Suranga
Good job.
Greetings
Ulises Aguilar Pazzani
December 5, 2015 at 12:49 am
good after noon Mr Suranga Bandara grate job Sir
R.KALIMUTHU
February 4, 2016 at 9:09 pm
THANKS FOR SHARING US.IT'S VERY NICE ARTICAL.
Vishnu
June 27, 2018 at 3:12 pm
its helpful, and i also have a doubt, Can I use a power unit from another LCD monitor (HCL) to power up a Dell monitor ??