
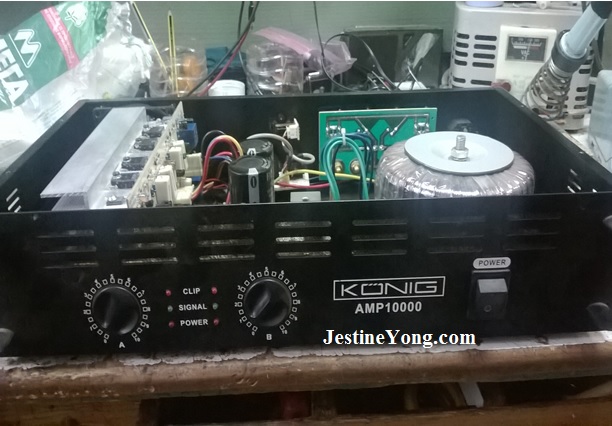
KONIG PA 10000 (2 x 500Watt) amplifier, no output in one channel repaired

This amplifier was given to me for repair after an unsuccessful repair intervention of another technician, who unfortunately left permanent traces of vandalism in its PCB trying to repair it without even using common sense in the methodology he used (if there was any). You will see why I am saying this below… This is a general view of the amplifier’s front panel and inner circuitry:
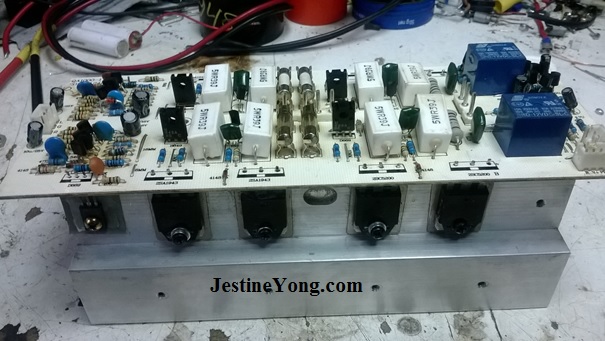
And this is the inner circuitry block of the pre-amplifiers and the power stages:
Below you can see the rest of it, namely the PSU PCB along with its toroidal transformer and the loudspeakers’ connection PCB.
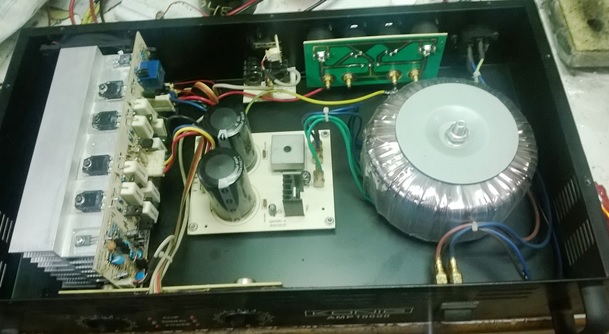
As you can easily understand, this is a monster amplifier and therefore it needs a huge heatsink to cool down its output transistors which become very hot in a few minutes, even having the loudness potentiometer fully closed. This is due to the high quiescent currents used to correct audio distortion at such high power design. That’s why the system does not relay on conventional cooling exclusively, but instead it is supported by a blower which works permanently and automatically. The reason is obvious and needs no further explanation.
The ventilator is located at the left corner, right after the heatsink, in the back side of this assembly and it is in line with it in order to achieve the highest degree of cooling efficiency. See below:
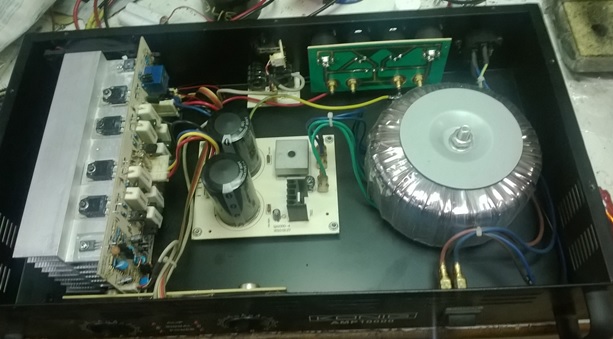
And also below:

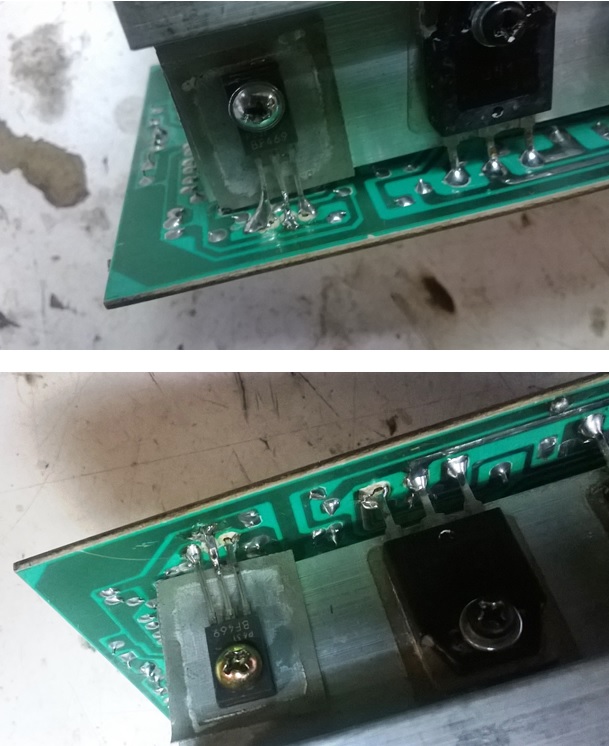
And here below you can see (among other points not shown by photos for the sake of space economy) the reason I spoke about vandalism during the repair attempt of my unknown colleague…
Seen once again these photos, let me please give you a piece of advice when working with assemblies like this one, in order to avert any vandalism that might result from your improper intervention:
- Be patient and reasonable. This is of utmost importance and above all.
There is no reason to hurry up when you face difficulties. Doing otherwise will mislead you and deprive your ability to see things clearly and find proper solutions to the problem you have in front of you. This in turn might bring with it negative feelings of frustration pressing you either to follow wrong steps that will end up to great trouble indeed or even force you to quit your attempt, failing to withstand the battle and perhaps rendering the device irreparable any longer…
- Use your imagination, which I am sure you have (at least just because you are involved in electronic repairs).
- Treat the device gently, especially it’s PCB(s), and in such a way as you would like your surgeon doctor to treat you during a surgery on your body. Try to remember this analogy of actions every time you have your soldering iron in your hand and before using it…
- Keep finally in mind that the purpose of your intervention is not only to bring the device back to life, but to secure its longevity after that. Not to put a death date on it.
In case you are a professional, the first above will bring you more customers in the future, while the second will very soon spread a bad reputation about you resulting in serious loss of customers, perhaps to the level of total business failure in case your business is situated within a small community.
As regards money making, let this follow your attempts and not (mis)lead them, due to the aforesaid reasons. And my technical advice for these cases is:
- Having such an assembly in hand, remove the heatsink first from it and then the semiconductors from the PCB. This will save the integrity of the PCB. So,
- Remove the screws retaining the semiconductors on the heatsink
- Remove the screws retaining the heatsink iself (if any. In my case there were no screws at all. The retainers of the heatsink were simply the semiconductors themselves).
- Free the heatsink from the assembly
- Now, with the PCB free in your hands and at your own pace, locate the defective power semiconductors.
If you already did that, it is now very easy and safe to remove them, despite the fact that they are soldered in the reverse way than the normal, that is, they are soldered directly at the solder side of the PCB and not at its component side, this being the cause of the need to remove the heatsink first from the assembly.
My colleague tried to remove them directly, trying first to desolder them, but this is impossible as they are not fully accessible from this side. He did not use desoldering braid as well, working probably with a sucking pump. But even working with an electrical desoldering pump, the back side of the power semiconductors remains soldered. No way to use the desoldering braid there either.
Moreover, his action had as a result the overheating of the PCB’s foil traces up to the point of having foil trace lifts in many points of it.
The explanation is again obvious. There was a high level of heat transfer from the points he worked through the terminals of the semiconductors which ended in this huge heatsink. So, in order for him to melt the solder, he kept increasing the soldering iron’s temperature probably to its maximum which caused those foil lifts…
- Replace the defective semiconductors with the new ones, taking care of the soldering distance of their terminals. Use the heatsink as a guide, making sure that the screw holes of the semiconductors coincide with their respective ones on the heatsink. Solder them afterwards one by one.
- Install the (new if possible) insulators putting thermally conductive paste wherever needed and
- Upon completion, reinstall the heatsink putting every screw back in its place and you are done.
Coming back to troubleshooting and the reason that I disassembled the unit, I did this first because of the obvious vandalism signs and then because all the fuses were intact and I needed to know what was the general condition of the solder joints of the PCB. Along with that, it was impossible to replace anything except the fuses without this disassembly…
With the PCB in hand I checked all the transistors of the circuit without to find anyone faulty. I also swept it for bad caps with my ESR meter, again without to find anything. Then I resoldered all the joints just for prevention against any “non typical failure” and cleaned the circuit using flux removing spray.
And the question was still there. What was the cause for this failure?
Well, there were not many suspect components left on it. I removed the two protection relays from the PCB and tested them out of circuit using my bench PSU. The first I took in hand was stuck. I could not hear any clicking noise when applying excitation voltage on its 12V coil terminals. The culprit was there. I decided to replace both the relays. The blue ones you see are the new ones.
After their replacement and the following reassembly of the entire device, the monster woke up with both its eyes wide open this time!
Finally it’s a pity that my colleague did not manage to complete the repair, as he did the most of it replacing all the defective semiconductors he found and missed a simple relay failure…

This article was prepared for you by Paris Azis from Athens-Greece. He is 59 years old and has more than 30 years’ experience in electronics repairs, both in consumer and industrial electronics. He started as a hobbyist at the age of 12 years and ended his professional carrier as a senior electronics technician. He has been a specialist in the entire range of consumer electronics repairs (: valve radio and BW TV receivers, transistorized color CRT TV, audio amps, reel and cassette tape recorders, telephone answering and telefax devices, electric irons, MW cooking devices e.t.c) working in his early stages at the official service departments of National-Panasonic first and JVC afterwards, at their premises in Athens.
Then he joined the telecoms industry, working for 20 years as field supporting technician in the sector of DMRs (: Digital Microwave Radio transmission stations), ending his carrier with this subject. Now he is a hobbyist again!
Please give a support by clicking on the social buttons below. Your feedback on the post is welcome. Please leave it in the comments.
P.S- If you enjoyed reading this, click here to subscribe to my blog (free subscription). That way, you’ll never miss a post. You can also forward this website link to your friends and colleagues-thanks!
Note: You can check out his previous repair article below:
https://www.jestineyong.com/blomberg-19-lcd-screen-tv-monitor-with-intermittent-shut-downs-repaired/
 (155)Dislikes
 (1)
(1)
24 Comments
Leave a Reply


Albert van Bemmelen
September 28, 2015 at 6:25 pm
A very good and also poetic repair Mr. Paris. Sentences like "There is no reason to hurry up when you face difficulties", and the line " Not to put a death date on it." really play with our imagination!
Thanks.
Paris Azis
September 29, 2015 at 1:29 am
Hello Albert
I believe that this is a legacy coming from my father who was high school teacher of ancient Greek. Believe it or not, this way of thinking (as I write) makes the dead devices “talk” to me about their death causes making then the repair procedure much easier for me. I am not hurrying just because I am willing to listen to their whisper in my ear…
Thank you for your warm acceptance of my writing. I really appreciate it.
On the other hand I don’t want the readers to be bored with a “dry” technical description I could easily give them.
Let’s put some feeling in an otherwise tedious job we are involved with, breaking its monotony…
Best Regards
Albert van Bemmelen
September 29, 2015 at 9:56 pm
And of course your quite humorous style of writing Helps! But I hope it won't be that fixed amplifier that is 'whispering' into your ears. 500 Watt Stereo could be to much. (Just Kidding).
Luciano Khware
September 28, 2015 at 6:50 pm
Hi Mr. Paris Azis,
Thanks for the article and the pieces of advice you have given. I have learnt a lot. Keep it up
Luciano
Paris Azis
September 29, 2015 at 1:34 am
Hello Luciano
Thank you too for your support. Moreover I am happy seen that you learned something from my article!
Best Regards
albert
September 28, 2015 at 7:52 pm
Mr.paris:
No doudt; excellent work. As you said, when you are doing troubleshooting ,patience ,observation and knowledge is the key to solve the problem.
Paris Azis
September 29, 2015 at 1:40 am
Hello Albert
Thank you for your positive comment. Yes, if you analyze "troubleshooting" you will easily see that first you must identify the trouble (measure and test) and then shoot it down (take the soldering iron in hand and perform replacements). Not vice versa.
Best Regards
Yogesh Panchal
September 28, 2015 at 9:21 pm
Sir, Good explanation and lines of integrity.
Paris Azis
September 29, 2015 at 1:41 am
Hello Yogesh
Thank you for your support.
Best Regards
Dan Schnaidt
September 28, 2015 at 9:36 pm
After locating defective power transistors, in addition to what you do above, I clip the leads at the base of the defective device & then remove them one at a time. It prevents damage to the PCB traces.
Paris Azis
September 29, 2015 at 1:09 am
Hello Dan
This is obvious to anyone, but how do you perform a (as perfect as the original) soldering of the terminals of the new power transistor, especially at its back side, as you don’t have any access on that side?
Best Regards
randy
September 29, 2015 at 1:00 am
Well done, Mr. Paris, your explanations indicate a professional at work. Unfortunately, in the vintage repair arena that I mostly work in, finding sloppy and poor quality work is all too common, doubling the time (and expense for the customer). All too many repair "techs" are in a hurry with the dollar clock moving and not having the proper tools to do the repairs properly, thus hurting both themselves and the overall community of electronics techs by the perception of their work.
Paris Azis
September 29, 2015 at 5:03 pm
Hello Randy
There is only one thing that makes me feel proud about my professional involvement with electronics. The fact that I have performed counless repairs up to now, without any single return of misrepaired equipment. There were returns for different failures of course, but not a single return due to an unreliable repair. Well, this can only happen if you respect your customers.
I fully agree with your thoughts. Mine are quite similar as you already understood. And finally yes, these colleagues of ours with the $ filter in front of their eyes are a terrible problem for both the devices they fall in their hands along with their owners and also all the rest of us who got rid of that $ filter and work beyond and above that. What they don't understand is that in our way much more money comes and a good reputation is always present and based upon a strong foundation...
Best Regards
Robert Calk
September 29, 2015 at 2:05 am
Excellent job, Paris. The other person that worked on it did not know what he was doing.
Paris Azis
September 29, 2015 at 5:45 pm
Hello Robert
Thank you for your warm comment. This is rather a difficult topic. In fact I feel that this person knew about repairs, as he did the most of the job, but he failed to complete this one (and this is exactly the point that I always insist on) just because he didn’t have any methodology in his mind before starting with it.
Well, this almost always leads the technician in running cycles around the problem, without letting him to enter the inside area of the cycle where the problem is and see what is to be done for eliminating it.
The net result of this is also equally well known: feelings of confusion, frustration and tendency to quit the case, especially after causing further damages either to the device under repair or to the testing instrument(s) on ones own bench due to lost focus on the job’s target…etc…and the story goes on. I have my own experiences from my early beginning with electronics…
At the end, it is a pity that this person “went to the spring to drink water, but remained thirsty” as a Greek wise-saying says…
Best Regards
Nimal
September 29, 2015 at 10:52 pm
Thank you Mr.Aziz for your tips regarding repairing equipment. Patience is very important. So, where could the fault have been. Was it the transistors, relay or both.
Best Regards
Paris Azis
September 30, 2015 at 6:20 pm
Hello Nimal
Thank you for your positive comment. I only found one protection relay defective, which was cutting its one channel output to the relevant loudspeaker and decided to replace both of the relays.
The previous technician found that this channel was completely burned out and replaced the entire power output stage.
Apparently, this stage was first burned out for some reason then the relay got stuck due to excessive current passed through its contacts.
This could have been happened simply because of inadequate cooling, resulting from an improper working place of the amplifier which didn't let enough fresh air to enter the unit in order to cool it, while disturbing the hot air to come out of the unit escaping in the environment. This is the most usual case of failures when audio amps are located in pieces of home furniture which form closed cabinets.
Best Regards
Anthony
September 30, 2015 at 3:42 am
Great resurrection of the device Paris and terrific very detailed explanation and nice photos giving us an insight of the task that lay ahead of you. Very good advice to liken the repair to that of a surgeon working on a human body which is imperative to give the repair its best chance of survival. Thank you for sharing this article and I very much enjoyed it and was really glad you brought it back to life !
Best Regards
Paris Azis
September 30, 2015 at 6:23 pm
Hello Antony
Thank you for your warm and supporting comment.
Best Regards
aziz
September 30, 2015 at 4:51 am
Thank you very much
Paris Azis
September 30, 2015 at 6:48 pm
Hello Aziz
How come we have almost the same name? Are we relatives? (Just joking)!
Thank you too.
Best Regards
Gary Gemmell
September 30, 2015 at 10:45 am
Very professional Mr Paris.
Sadly we are all a dying breed these days where speed, board swapping and hence charging customers through the nose is the norm!
You are also right it can destroy a business just a few customers reporting to their friends and other businesses that you do a bad job!
Paris Azis
September 30, 2015 at 6:43 pm
Hello Gary
I accept that what you describe is a great part of our (not so bright as it should be) reality, but as all things in life, this behaviour of ours should have a limit...
Just keep in your mind that "the improperly repaired electronic equipment returns to the technician for a new repair, but its owner doesn't"...
And if ever science finds that there is something in this world that travels in a higher speed than that of light, no doubt this will be the bad reputation...
Best Regards
Subhendu Roy
October 1, 2015 at 9:00 pm
Mr. Paris
Thanks for your article. I think you would be a very successful writer if you started your carrier as a writer. But it is better because I am enjoying both of your technical and writing skill. Personally my thoughts are same like you. I feel very glad.
Thanks a lot.
Paris Azis
October 6, 2015 at 4:11 pm
Hello Roy
Thank you for your warm comment. Moreover it makes me feel happy that we have some ideas in common, and I would also like to tell you that I take this note of yours about my writing very seriously. Please excuse my delay to answer you.
Best Regards
Ulises Aguilar Pazzani
October 3, 2015 at 11:27 am
good after noon Mr Azis, great job , specialy the way You wroted and splainded Great Job Sir good strategy
Paris Azis
October 6, 2015 at 4:41 pm
Hello Ulises
Every job needs the proper way to execute it, along with some qualities on the part of the person who is to execute its tasks. You call it “strategy”.
As this word is of Greek origin, I fully understand its meaning. It means “to follow a general plan”, which gives to your actions a logic sequence, which in turn is what we need to reach success.
Nevertheless, I prefer another (Greek again) term, which is “methodology” or simply “method” which has almost the same meaning, but it is more specific. The general plan is now a specific-narrowed down plan, and it fits better when used in problem solving.
In conclusion, yes, working without any plan, no matter how we call it, is the best way to enter an odyssey… (And as your name, Ulises, has a direct connection with this story, you must always use a plan you have prepared in advance)…!!
Please excuse my delay to answer you.
Best Regards