
January 1st, oscilloscope hangover!

The first day of the year, still recovering from the New Year’s Celebrations, I had planned to have a lazy afternoon. On my desk laid a board sent to me by a friend for troubleshooting. I needed to check a few signals and, as this was not an urgent job, easily accessible, it would perfectly fit to the mood of the moment. I pressed the ON button on my trusted oscilloscope, expecting the usual start screen and buttons glowing but… nothing.
No panic, maybe the cleaning lady disconnected the power plug under the desk in order to connect her vacuum cleaner. This happened before! Still not motivated to kneeling down under the desk I pulled the plug at the back of the scope and checked for voltage. No luck the voltage was there, no need to go under the desk!

Maybe it was the fuse? The fuse holder is located inside the 240V power socket at the back of the scope. The fuse was OK too. A blown fuse wouldn’t have made my day anyway because fuses usually blow for a reason and it is rarely good news!

The last thing I wanted to do on a January 1st was opening a box and start troubleshooting. However, after a brief survey it appeared that I wouldn’t need a mini-crowbar or some kind of can opener, like it is sometimes the case for opening some modern equipment! All I needed was just removing a few screws; so the curiosity took over the laziness and I grabbed a screwdriver.
Indeed, 4 screws at the bottom near the front feet and 2 small screws on the top, hidden behind the handle, and the back of the scope came out easily. Inside, the whole circuitry was shielded and the back of the shield came out just by removing the 2 nuts of the DB 9. Then here it was, nicely built with the power supply very accessible.
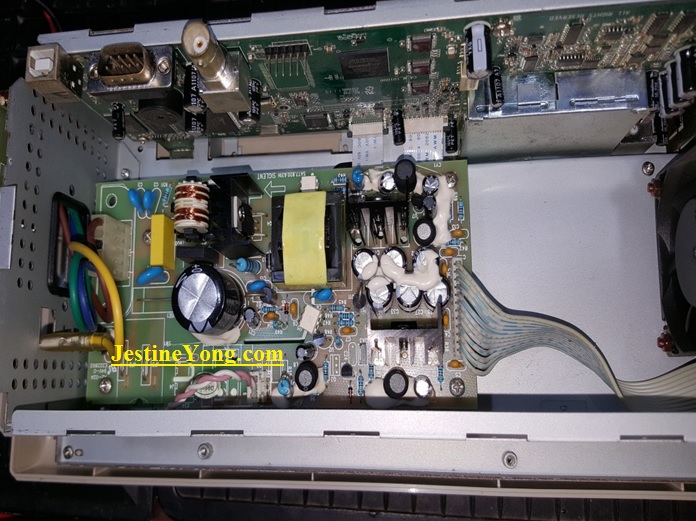
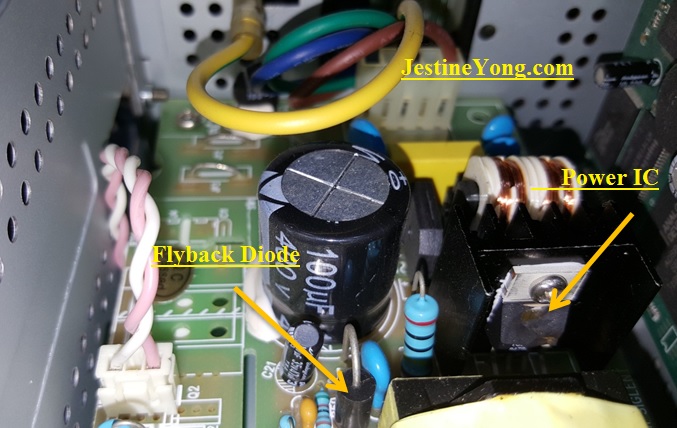
Already from here I could see that the power IC switcher had literally exploded, its face had gone! Having not found any circuit diagram for this scope I hoped to find the missing part of the IC in order to identify it.
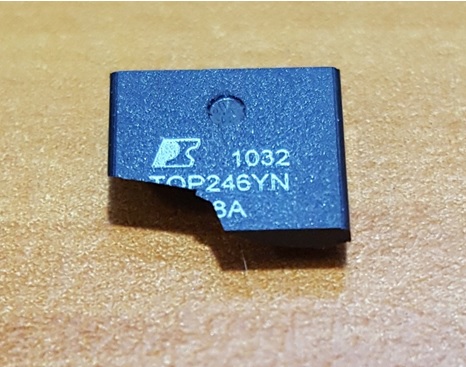
And there it was, at the bottom of the scope’s cabinet, in one piece with the marking perfectly readable: TOP246YN with excellent data sheets available on the Internet. It was not such a bad day after all and the feeling of laziness had totally gone…
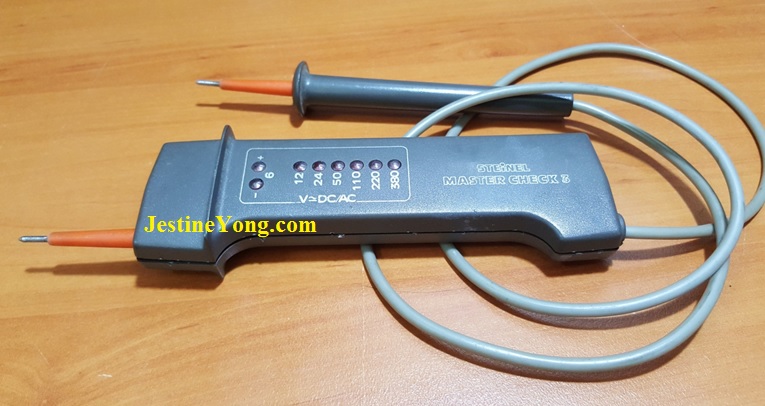
The next step was to carefully remove the power supply board from the cabinet, discharge the capacitor and try to figure out what happened and why? The board was easy to take out, just by removing two connectors and a few screws. To discharge the capacitor I used an old tester that had been in my toolbox for 30 years. It was very handy during my field service years to quickly find out what sort of voltage existed between two terminals within a machine, when trying to identify a badly documented wiring. In a glance you knew the approximate voltage (6 to 380V) if it was AC or DC and the polarity if it was DC. As it sinks about 10 mA it is also useful to quickly and safely discharge a capacitor and the LEDs show when it is fully discharged.
Then, removing the blown up IC and starting the measurements. One of the flyback diode was found dead shorted, type 1.5KE200A. The Datasheet was also available on the Internet. All the other components of the primary part of the power supply tested OK. Following the tracks I found out that this power supply’s topology was very similar to one of the application example from the TOP242-250 datasheet:

Did the diode VR1 go into short first then the IC went bang as a result? Difficult to say but possible…
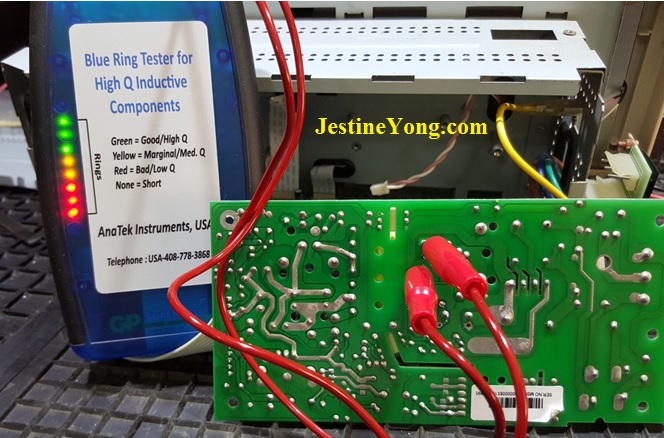
Then I checked the primary of the transformer and found it good. For more information about this test please check the link below: http://www.electronicrepairguide.com/blueringtesterresult.html
On the secondary side there were no signs of overload or over heating and all the components tested OK. So I placed an order to UTSource for the faulty components and went back to my quiet Friday afternoon…
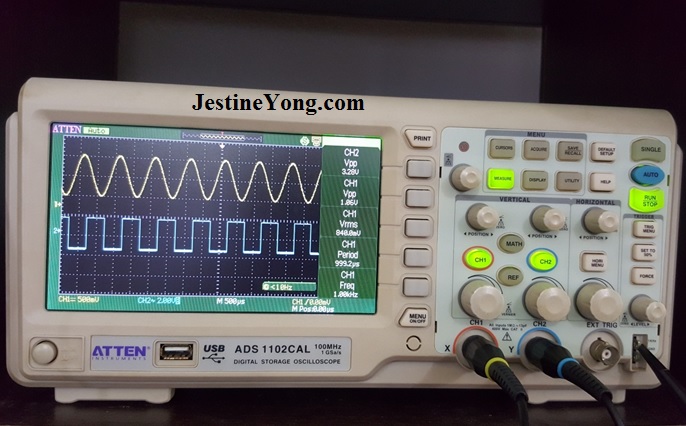
It took for ever to receive the components from UTSource. Order processed on January 3rd and parcel received on January 22nd with many confusing tracking messages received in between. At one stage it said that the parcel was picked up on the 7th. Another message later said that it was picked up on the 15th. I was about to give up and place an order somewhere else when the small parcel finally arrived. Half an hour later the oscilloscope was alife again…
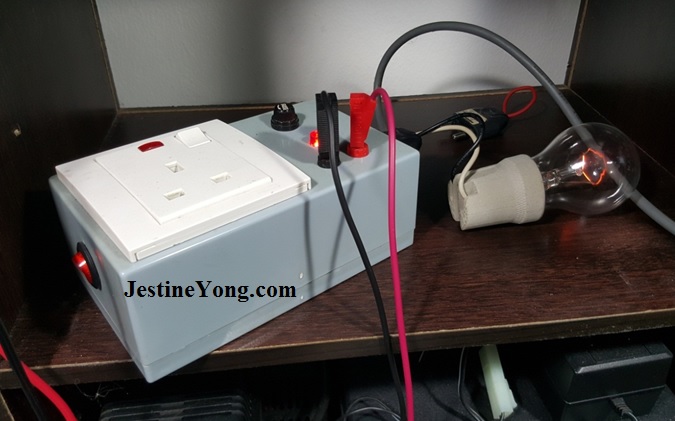
Carefully testing the power supply with the lamp in series first:
Then fully re-assembled:
After leaving the scope powered on overnight and using it during two days I considered the repair as successful. This ATTEN is a cheap model but suitable for the day to day works. It was an easy repair helped by the accessibility of the circuitry. I wish all would be like this.
I was also lucky to be able to identify the type of power IC used. Otherwise the alternative would have been to use the universal external power module as described in the following document:
http://www.lcdmonitorcasehistories.com/powersupplymodification.html
This would have made my day a bit harder but certainly would have produced a more interesting article.

Penang,
Gerald Musy
Please give a support by clicking on the social buttons below. Your feedback on the post is welcome. Please leave it in the comments.
P.S- If you enjoyed reading this, click here to subscribe to my blog (free subscription). That way, you’ll never miss a post. You can also forward this website link to your friends and colleagues-thanks!
You may check out his other article below:
https://www.jestineyong.com/accuracy-precision-and-resolution/
 (119)Dislikes
 (0)
(0)
12 Comments
Leave a Reply


Albert van Bemmelen
January 26, 2016 at 3:48 pm
Thanks Gerald for your always educating articles. And I'm glad you could repair your Oscilloscope again!
Gerald
January 28, 2016 at 7:47 am
Thanks for your support Albert
Robert Calk
January 26, 2016 at 6:37 pm
Nice article and photos, Gerald. I have been waiting for the opportunity to use Mr. Yong's SMPS Modification Secrets myself. I'm glad you have your scope back.
Gerald
January 28, 2016 at 7:49 am
Same here Robert. In this case it was so much easier to replace with the same IC. Thanks for your support.
Parasuraman S
January 26, 2016 at 7:33 pm
Very educative article, that too on our bench top partner!
Gerald
January 28, 2016 at 7:50 am
Thanks Parasuraman
beh
January 27, 2016 at 4:59 pm
Hi Gerald
your article like always is useful and informative keep it up.
Gerald
January 28, 2016 at 7:51 am
Thanks Beh
Andre Gopee
January 28, 2016 at 6:32 am
Nice repair article. If only all the repairs were this simple life would be a better place and less frustrating.
Gerald
January 28, 2016 at 7:53 am
Oh yes, life would be easier. We need to be lucky time to time but we also like the challenges. Thanks for your support Andre.
Cheers,
GM
Randy
January 28, 2016 at 9:40 am
Gerald, do you have a build article for your lamp box? It's a very nice looking lamp tester! thanks
Gerald
January 29, 2016 at 8:19 am
Hi Randy,
Thanks for your comment and support. You can find a description of the box at: https://www.jestineyong.com/homemade-power-box/
Following that article and some comments I added a switch on the side of the box (you can see it from the picture). The switch insulates completely the box when it is OFF, for safety reasons.
Cheers,
Gerald